
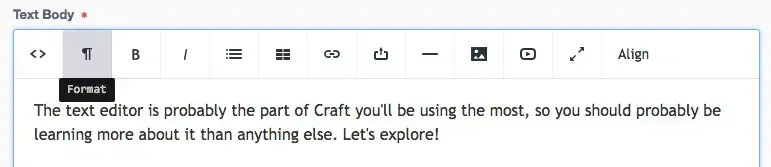
The text editor is probably the part of Craft you'll be using the most, so you should probably be learning more about it than anything else. Let's explore!
At the top of the Text Content block, you'll see Craft's minimalist toolbar. It's got the stuff on it you're most likely to use. We'll talk about the simple stuff first, then get into the things that take a little more explanation.
 |
If you hover your mouse over any of the toolbar icons, the icon will tell you its name, which is also a hint at its function, because that's how these things work. Let's go over these tools.
These do exactly what you think they do, and work exactly like the ones you'll encounter in any word processor or blogging software.
This toggles your view between the semi-preview kind of view of the text and a view of the HTML code that underpins it. Unless you're experienced with HTML, you're probably best off not using this one.
This lets you format text into bulleted or numbered lists. You can use the indent and outdent menu items to make smaller lists within your larger lists.
- Here's an unordered item
- And another one
- But wait:
- First, a numbered item
- Second, another one
- Third, one more
- So, yes
Clicking "Fullscreen" expands the text editor to fill your entire browser window. Its utility is up for debate, but it's available if you want it.
I will let you guess what this one does.
Take as long as you need. It's not a race.
The Toolbar: Medium Topics
This lets you link text to another page on our website, to an external site, or to an email address.
Click "Link to an entry," then find and choose the page you're looking for in the window that opens. Please use this method only when linking to pages on our website. The reason for this is that, if the page you're linking to ever moves, the link will update itself instead of turning into a broken link.
Linking to an external site
Click "Insert Link," then copy and paste the URL of the external site you're linking to in the "URL" field. When linking to an external site, please make sure the "open in new window" box is checked.
Linking to an email address
Click "Insert Link," then copy and paste the email address into the URL field.
NOTE: Unlike in previous content management systems, you do not need to add "mailto:" in the URL field. Craft will recognize the email address and add code accordingly.
This button is used for linking to PDFs and other files. Click it, and a window to browse the Assets area will appear. You can browse by folder, or search using whole words (be sure the "search subfolders" box is checked if you use the search box).
Use this to embed Youtube or Vimeo videos in your page. Just click the button, then copy + paste the URL or the embed code of the video you want to embed, then click "Insert." Simple!
Here are the basics: Upload the image you want to use into the appropriate Assets subfolder, then put it in your text area using the Image button. Click the button, find your image, click "Select," and you're off and running! Read more about working with images in Craft here.
Use this tool to insert a table into your page. A couple of important notes here:
- Only use tables when it's the only clear way to display data. A good example can be found on the Financial Aid pages — see the Freshman Scholarships area. There's a lot of data that can only be clearly presented in tables.
- If you use tables, you must use a Header row and header left column. This is necessary to make sure our website maintains compliance with ADA web standards.
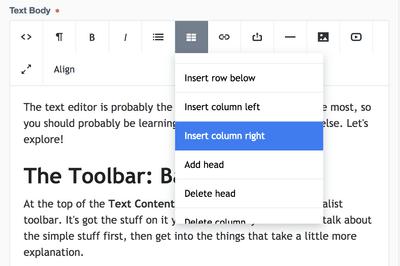
- The Table drop-down menu scrolls, even though it doesn't look like it will. At first glance it seems like there just aren't many options in the menu, but they're there; you just have to scroll down (see below). Sorry, it's confusing.
So, to insert a table, click "Table," then "Insert table."
| ROWS IN DEFAULT TABLE | two | definitely two |
| COLUMNS IN DEFAULT TABLE | three | probably three, yeah |
 |
By default, tables don't have header rows, so the first thing you'll need to do is click "Add Head."
| OH THIS IS DEFINITELY A HEADER ROW | YAH | O YAH |
|---|---|---|
| THIS TABLE HAS A HEADER ROW | x | x |
| THIS TABLE HAS THREE COLUMNS, STILL | x |
Note the formatting of the header row and column; this formatting can not be changed.
The other options in the Table menu allow you to add or delete rows, columns, the header row, or, if you're not feeling satisfied with the work you've done, the whole table.
